Are you looking into building a deck? Are you wondering if a deck ledger board is needed?
Or, have you recently had a structural engineer inspection and were told your deck ledger board has rotted out?
These are scenarios when you may be interested in learning more about deck ledger boards.
In this post we will go through:
- What a deck ledger board is
- If it’s possible to build a deck without a ledger board
- What size deck ledger board is required (& building permit requirements)
- If deck ledger boards can be multiple pieces
- When to replace a deck ledger board
- General guidelines on how to install a deck ledger board (& what to do if you have brick facade)
- Installing a deck ledger board on a cantilevered floor
- Bolts & fasteners needed for deck ledger boards
- Freestanding versus attached decks
Read on to learn more.
What is a deck ledger board?
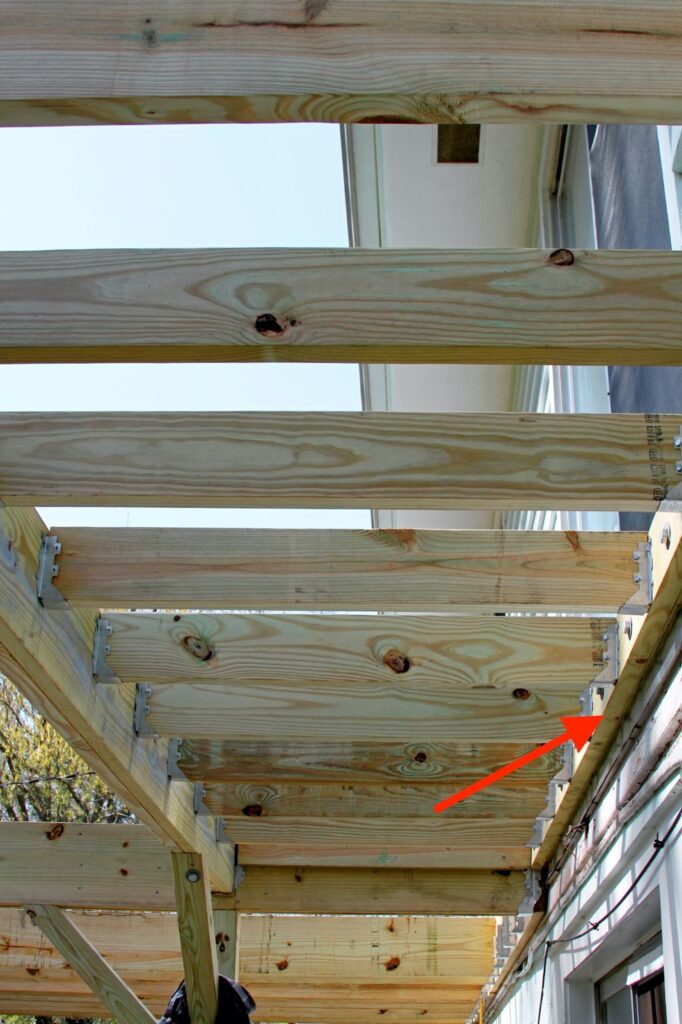
A deck ledger board is a piece of pressure-treated dimensional lumber that is responsible for connecting a deck to a house or other structure. The ledger board will be attached (by bolts or screws) to a structure’s frame. Deck joists can then be attached to the ledger board.
You may not have known this, but the deck ledger board is a structural component responsible for distributing the deck’s weight and live load to the adjoining building’s framing system and deck footings.
There’s a common statistic floating around the internet that says the ledger board will distribute 50% of the deck’s live and dead loads to the attached building’s framing. Just understand that this statistic is highly unreliable. Structural engineer’s design decks with specific goals in mind. Typically, they try to distribute loads more so to the deck footings and less to the attached building’s framing.
This leads us to our next topic, is a deck ledger board necessary?
Can you build a deck without a ledger board?
If the intention is to build a deck that is attached to a house, building or other structure, then you absolutely need a ledger board. Typically, the only kind of deck that will not require a ledger board is a free standing deck.
So, why is a ledger board needed in almost all cases?
First off, The International Residential Building Code (IRC) sets the standard for deck requirements. It requires that decks be capable of supporting 50 lbs per square foot: 10 pounds of deadweight (the deck) and 40 pounds of live weight (people and furniture on the deck) per square foot.
Since the wall of a house is not designed to support these loads, a ledger board becomes necessary. As we discussed in the section above, the ledger board will help to distribute loads appropriately (according to an engineer’s plan) to both the building/home’s foundation as well as the deck footings. Without a ledger board, deck collapse is extremely likely.
What size deck ledger board is required?
Check out your state’s & city residential codes to determine what size your deck ledger board must be (or call an engineer).
Here in Minnesota the requirements are as follows:
“A ledger board attached to the exterior wall of the primary structure must be at least 2-inch by 8-inch nominal. Pressure-preservative-treated Southern pine, incised pressure-preservative treated hem-fir, or approved, naturally durable, No. 2 grade or better lumber. Deck ledgers must not support concentrated loads from beams or girders and cannot be supported on stone or masonry veneer.”
Another factor to consider is whether or not you will need a building permit. In Minnesota a building permit is required when:
- When a deck or a platform is more than 30 inches above adjacent grade
- When a deck or platform is attached to a structure with frost footings
- When a deck or platform is part of an accessible route
It’s also important to note that there are state regulations, city regulations, county regulations, and even township regulations. It’s always best to be aware of the requirements for your area before building. Give your city building department a call to clear up any confusion.
There are times when a building department will require a licensed structural engineer to verify the deck plans are structurally sound. Examples could be: a) the land the deck will be built upon has poor soils or b) the design is very unique or c) there is no structural drawing depicting the plan.
Here’s an example of a report from a structural engineer.
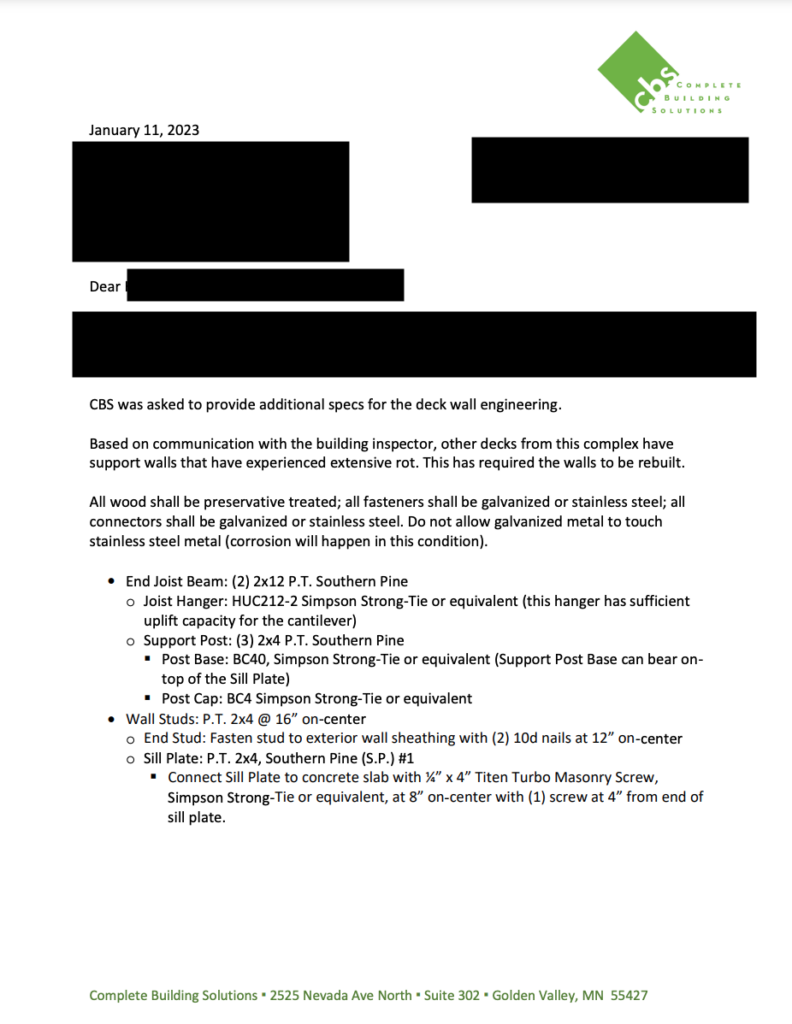
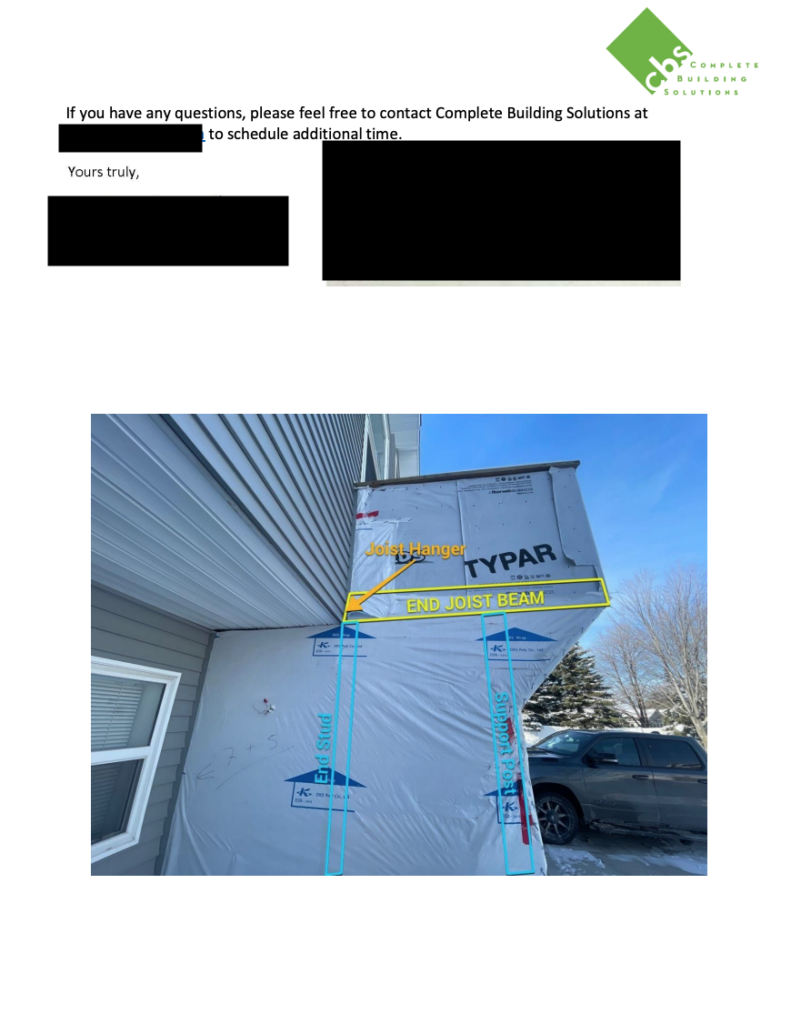
Regardless of the reason, be sure to ask your building department exactly what they are looking for so you can communicate efficiently with your structural engineer.
If the structural engineer finds fault in the existing deck plan, they will need to implement a correct design and sign off on it so the plan can be submitted to the city building department for review.
Perhaps the existing plan is satisfactory but the building department wants a structural drawing. The structural engineer will always verify the plan is satisfactory but will also be able to create a drawing for your building department needs.
If the original deck plan was satisfactory, the structural engineer will sign off on the design and a building permit can be pulled.
Can a deck ledger board be two pieces?
The short answer to the question, “Can a deck ledger board be two pieces” is…yes.
Why would one want to use multiple boards for a ledger board?
Well, there are scenarios where a vent, pipe, or spigot from furnaces, dryers and water heaters could be getting in your way. If this is the case, installing ledger board around the vents by using multiple pieces, will be the easiest route.
If you plan to use multiple sections for your ledger board, extra bolts will be required as well as a 2x nailer at the top of the vent to secure the decking along the house wall.
Another factor to consider is where the deck joists are falling. The spacing may need to be adjusted to ensure a joist does not land upon one of these obstacles.
These are all questions for a structural engineer.
Get a free quote on your project!
Ready to start your project? Reach out to Complete Building solutions and get a quote absolutely free.
When to replace my deck ledger board?
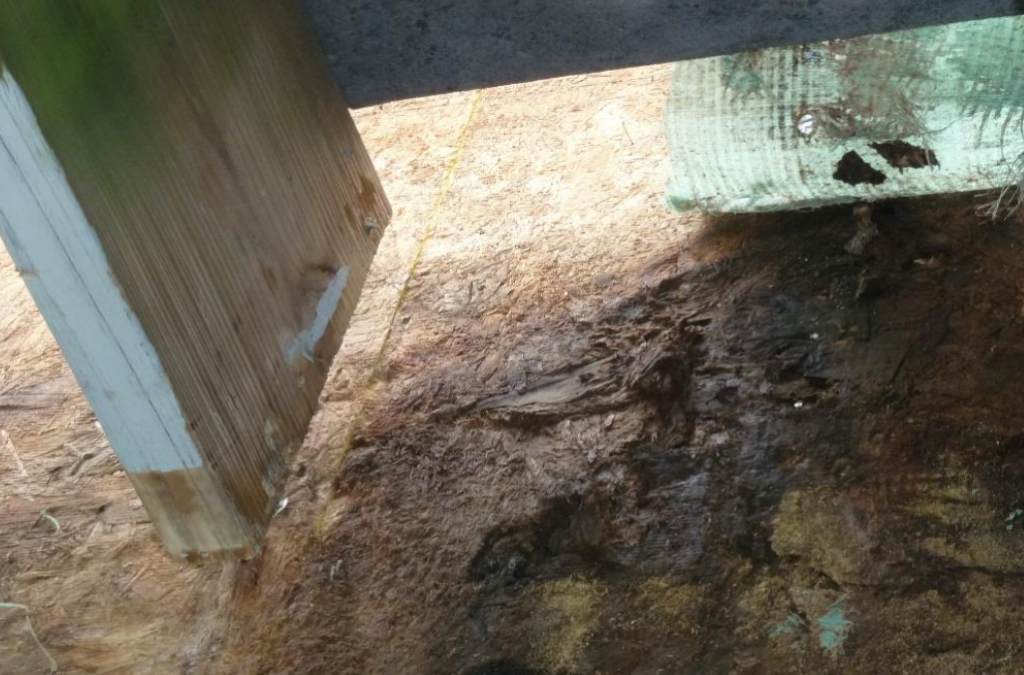
Since faulty deck ledger boards are a common cause of deck collapse, it’s important to do regular inspections.
If your ledger board was installed improperly, it should be repaired or replaced immediately.
The best way to know if your ledger board is faulty (or any other part of your deck for that matter) is to hire a structural engineer or home inspector to perform an inspection. These professionals are trained to know exactly what to look for.
However, here are some general red flags to look for:
- Ledger board attached with nails- This should NEVER happen. All ledger boards should be attached to adjoining structures with code compliant fasteners. Lag screws and bolts are examples of acceptable fasteners. To learn more about deck ledger fasteners, click here. Note- It has really only been over the past 5-6 years that contractors have stopped using nails to fasten ledger boards. Structural engineers started calling for different fasteners in order to make decks more safe. With that being said, there are still many decks out there using nails to fasten ledger boards to their framing. This is a safety issue that should be addressed.

- Lag screws not attaching into anything behind the ledger board- Structure Tech Home Inspections will tell you that they’ve seen lag screws attaching to nothing but the fiberboard wall sheathing. That is scary.
- Flashing to prevent rot- Do you see a piece of metal sticking over the edge of the legerboard when looking from below? Hopefully you do. However, this doesn’t mean it 100% was installed correctly. It should extend under the siding if it was done properly. Flashing is crucial for guiding water away from building components. When water is allowed to sit, rot begins.
Note- Within the past 3-4 years, it’s FINALLY becoming more common to see ledger boards flashed correctly. Manufacturing companies of various waterproofing membranes started dictating stricter installation specs. With better instructions on how to use the product, we start to see better installation methods and less water intrusion issues. Nobody wants to be sued if a ledger board rots out.
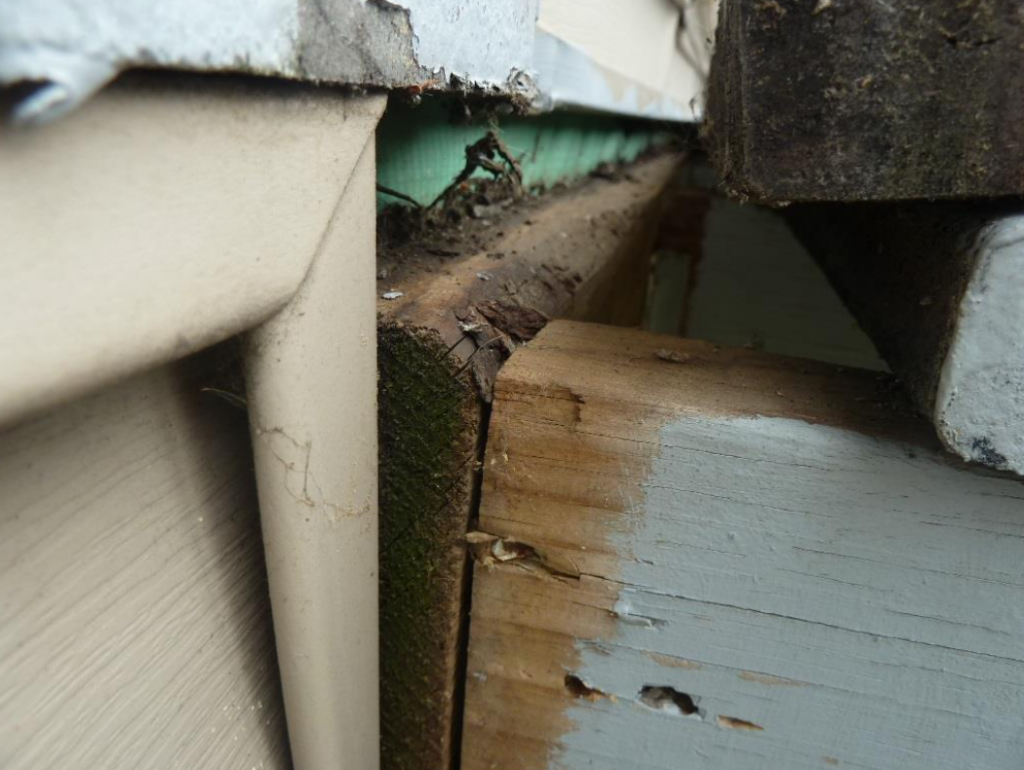
- Incorrect installation of joist hangers- Look for missing nails (there should be a nail in each hole), improper joist hanger nails, screws instead of nails, joist hangers that have been cut or bent.
- Rot- Rot obviously threatens the structural integrity of a deck. Use a screwdriver and poke at various areas on the deck in search of rot. One of the first places to rot is where two deck boards meet over a joist. If you don’t think your deck has adequate ledger board flashing, definitely check this area out.

Proper Placement and Spacing Of A Ledger Board For Deck Stability
Choosing where and how to position your ledger board for deck stability is just as important as attaching it correctly.
The ledger board should always be anchored to solid framing, never just sheathing or siding.
Before installation, check that the board is completely level.
A slight misalignment now can cause long term structural problems later! Spacing matters, too.
If the ledger board is too low, it can create an uneven step from your home to the deck, leading to a potential tripping hazard.
On the other hand, placing it too high can make railing heights awkward or even out of code. Always measure carefully before securing anything.
General guidelines on how to install a deck ledger board on houses with vinyl, wood, concrete, brick or stucco siding-
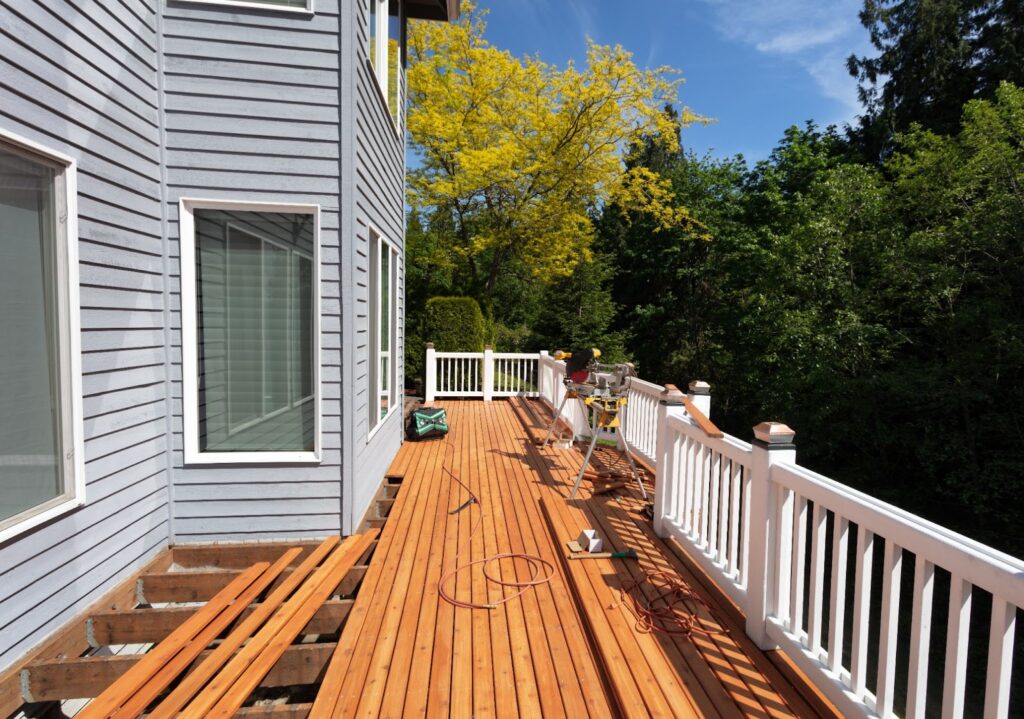
Prep the house-
Mark cut and remove any existing siding where the ledger board will be installed. Whether it’s vinyl, concrete, wood, brick or stucco…it has to go.
Waterproofing: self adhered membrane-
Apply a self adhered membrane on the wall where the siding was removed. The membrane should extend 4-6 inches above the top of the ledger board. It should also extend 3-4 inches below the bottom of the ledger board.
Cut and layout the ledger board-
Choose a very straight board. The size of the ledger board and screw pattern will be determined per building code and your structural engineer (structural engineer instructions are gold and will trump building code). It’s a good idea to mark the positions of joist hangers and bolts/screws. Some contractors will choose to pre-drill the bolt/screw locations. Certain products will allow you to avoid pre-drilling.
Install ledger board-
Put the board into position. Bolt/Screw the board into place according to your structural engineer’s instructions. The screws should extend through the wall sheathing and into the house rim joist. The tip of the screw should be visibly extending through the rim joist.
Waterproofing: more self adhered membrane-
Remember the goal is to get water to flow over the top of the ledger board and NOT behind it. Once water gets behind the ledger board, the area is prone to rot. So, to be absolutely sure that the ledger board is protected, install an additional piece of self adhered membrane on the top of the ledger. The membrane will run up the wall and a small part of the membrane will actually hang over the ledger board. It could extend down the face of the ledger board ¼ inch or could even extend all the way to the bottom of the board. It comes down to contractor preference (or manufacturer specs). See the photo below.

It’s easier to work with several small pieces versus one long piece. Make sure the membrane extends beyond the end of the ledger board.
Note- What is really important here is how the different membranes overlap each other. It’s common to find construction defects even in new construction homes. When it comes to waterproofing a construction defect called reverse lap is very common.
Here’s a video on what NOT to do when waterproofing.
Install joist hangers-
Install joist hangers before the final metal flashing is installed.
Waterproofing: Metal flashing-
The metal flashing will be installed on top of the ledger board. This is an important final step in the waterproofing process to guide water over the front of the ledger board and not behind it. It also protects the membrane below it from UV light. Once the metal flashing has been fastened, the water resistant barrier can come over the top of the metal flashing.

To watch a video on this process, click here.
Note on attaching deck ledger boards to brick, stone or masonry veneer-
Per the International Residential Code, section 507.9.1.1, “Deck ledgers shall not be supported on stone or masonry veneer.”
You may be wondering why code would dictate this.
Well, stone, masonry and brick veneer actually sit about 1 inch away from a wood framed wall in order to avoid moisture intrusion issues. Due to the risk factor of ripping veneer right off the wall, you cannot simply bolt a ledger board into it.
It’s also NOT a good idea to try drilling lag screws through the veneer into the house’s rim joist. This could damage the veneer and create moisture intrusion issues if the veneer were to be moved too closely to the wood-framed wall. Not to mention the issues that could arise from loads being placed upon a non-structural veneer wall.
Note- Speak with a structural engineer on this. There are situations where brick facades sit on a brick ledge or angle iron. If the brick facade system was installed properly, a structural engineer can help you determine the best way to attach a deck to the house.
As a structural engineering firm, we do see MANY decks that were built incorrectly. In the case that a ledger board was attached to a veneer wall improperly, there may be a few options for correcting the situation.
First and foremost, we always recommend speaking to your structural engineer before attempting any changes.
With that being said, some situations could remedy the problem. Sometimes turning the existing deck into a freestanding deck is possible. There are also brackets capable of maintaining space between the veneer and the wood-framed wall while also utilizing long lag screws and a strut to support the ledger board. These two solutions may not always be doable. Check with your structural engineer if you think your deck was installed incorrectly on a veneer wall.
Installing A Deck Ledger Board On A Cantilevered Floor-
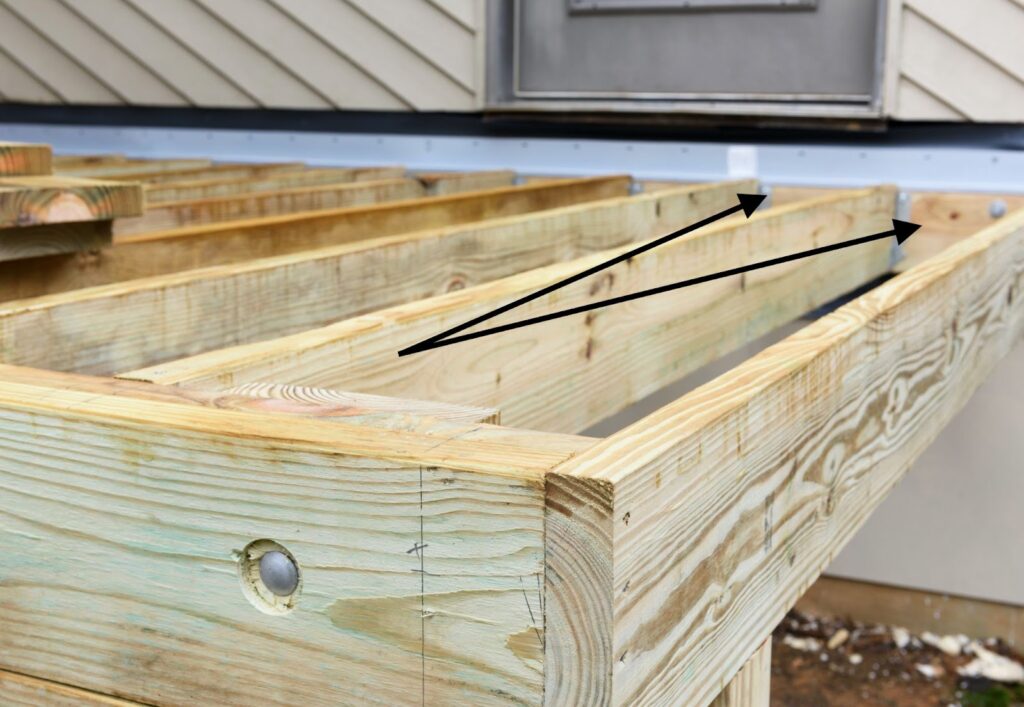
Generally speaking, it’s not a good idea to attach a deck to a cantilevered floor. For those who don’t know what a cantilevered floor is, it’s basically an overhang. Do you see the overhang in the photo below? Now imagine there was a deck built off of this.

So, why is this typically not a great plan? Well, there are no structural supports located underneath the overhang to keep the rim joist at the house from pulling loose. This can lead to deck failure.
Now, if a deck built off a cantilevered floor was something a client really wanted, a structural engineer could come up with a solution to make their dream a reality. It just boils down to how much money does a client want to put into engineering.
What size bolts are needed for a deck ledger board?
This is a very specific question that gets asked frequently, so we thought we’d address it. Bolt sizing may vary depending on state building codes and specific engineering needs.
However, in Minnesota, the 2020 MRC says, “ Fasteners used in deck ledger connections in accordance with MRC Tables R507.9.1.3(1) shall be hot-dipped galvanized or stainless steel and shall be installed in accordance with Table R507.9.1.3(2) and figures R507.9.1.3(1) and R507.9.1.3(2). Where connections to the primary structure cannot be verified during inspection, decks must be self-supporting.”
You can find these tables and figures below.


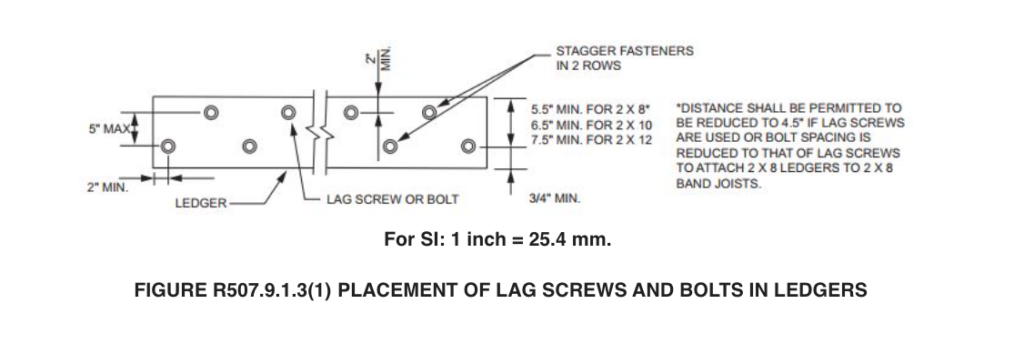
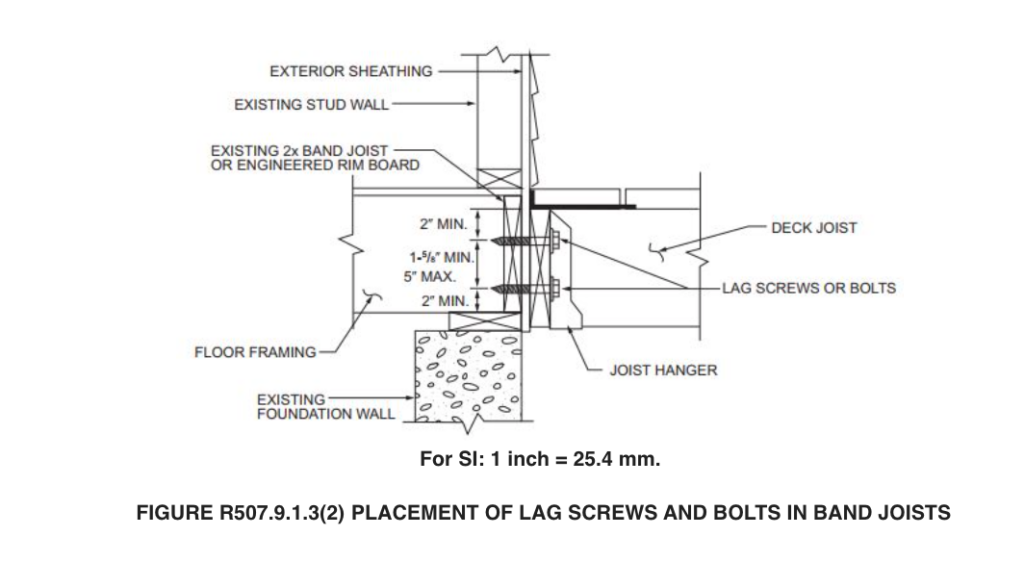
So, what size bolt is required? Well, Table 507.9.1.3 (1) calls for a ½ inch diameter bolt with ½ -1 inch maximum sheathing. Remember, holes for bolts must be drilled between 1/32 and 1/16 of an inch larger than the bolt.
But, again, your structural engineer will call out the correct fasteners for your project. Each project is unique.
If you have any questions about the fasteners or install pattern you intend to use for your deck ledger board, you can reach out to your local building department or structural engineer.
What is the difference between a freestanding deck and a deck with a ledger board-
At this point you probably have a pretty great understanding about what a deck ledger board is and why it’s crucial to use for the attachment of a deck to a home or other structure.
We’ve also mentioned freestanding decks a few times throughout this blog, but have not gone into depth on the topic. Let’s talk about them now.
Freestanding Deck-

Freestanding decks are NOT attached to your home or structure and, as the name implies, are self-supported. It’s a common choice for homes with brick and stucco siding because of the challenges that come with installing deck ledger boards on these types of homes/buildings.
Freestanding decks must have footings that are drilled below the frost lines in order to avoid falling prey to the freeze-thaw-cycle and frost heave complications that accompany it.
Overall, there are many pros that come with building a freestanding deck such as:
- Since there is no attachment to a building, there are no water intrusion issues (water intrusion issues occur from poor installs on ledger boards)
- It’s the best choice for brick, stone, stucco and veneer facade
- It doesn’t add additional weight to a home/building
- It’s a simple design and install (as long as soils are properly addressed)
What about the cons:
- Decks over 10 feet may have a slight sway to them
- Improper footing installation can lead to issues such as slanting or drifting away from the house
Let’s do a little comparison and contrast.
Attached decks utilizing a deck ledger board-
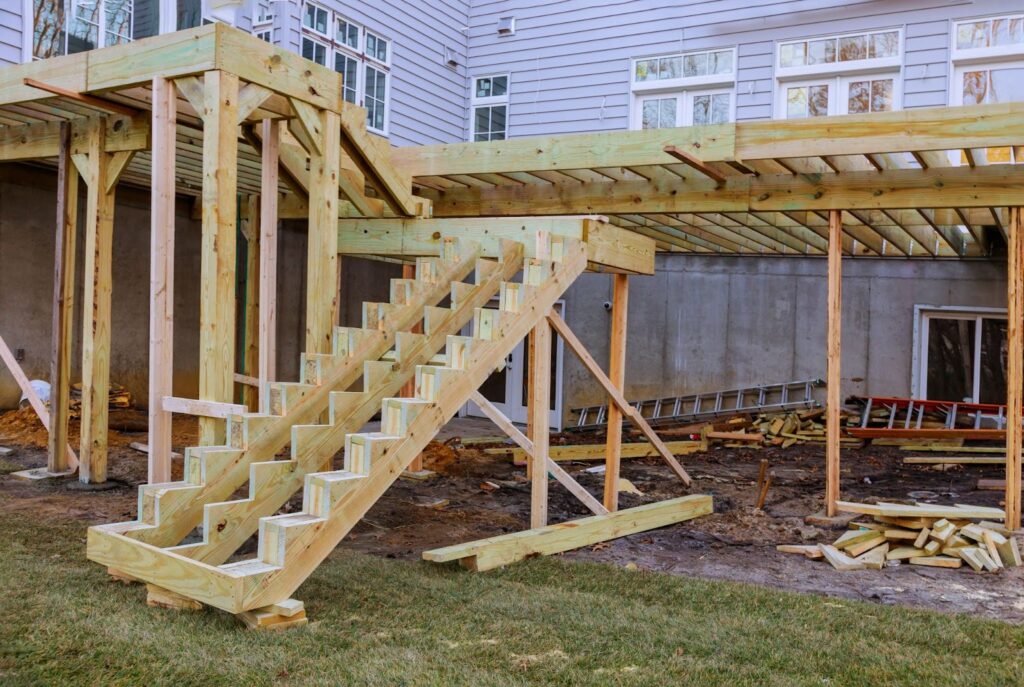
As you know, attached decks are literally attached to your home or building via a deck ledger board. The most common cause of decks failures is due to improperly installed ledger boards. So, let’s hope you have a great contractor that knows the in’s and out’s of ledger board installation…right?
Let’s talk about the pros:
- Fewer structural posts are needed to support the deck since the ledger board distributes about 50% of the deck weight to the framing system of the house or building it’s attached to.
- It leaves more room for storage space or a patio underneath
- Less “sway” than a freestanding deck especially with decks over 10 feet tall
How about the cons:
- Water damage is likely with incorrect installation
- Deck failure can occur again from improper installation methods
- It can be expensive depending upon the existing siding (brick and stone veneer can be challenging and require more engineering costs)
The Role of Fasteners When Installing a Ledger Board for Deck Support
When installing a ledger board for deck support, the type of fasteners you use can make or break the entire structure.
Nails alone won’t cut it, they can loosen over time, leading to an unsafe deck.
Instead, use lag screws, structural bolts, or ledger board fasteners designed for heavy loads.
Fastener spacing is also crucial. They should be staggered to evenly distribute weight rather than lined up in a single row, which can weaken the board over time.
A general rule is one fastener every 16 inches, but this varies based on deck size and load requirements.
If you’re unsure, consult an engineer or local building inspector to ensure your deck stays rock solid for years to come.
How Deck Ledger Boards Impact Deck Stability and Safety
Deck ledger boards play a vital role in anchoring the deck to your home, directly influencing its stability and overall durability. A securely attached ledger board distributes the deck’s weight evenly to the house, alleviating strain on posts and support beams.
This strong attachment also maintains proper alignment and balance, making the deck more resilient under heavy loads. Without a correctly installed ledger board, the deck’s structure may weaken over time, increasing the risk of sagging or even collapse.
For deck builders in Minneapolis, installing a properly treated ledger board is key to meeting local building codes and improving safety.
Proper flashing installation between the ledger board and house wall is essential as it prevents moisture buildup and wood rot, both of which can compromise deck integrity. By following these standards, you protect your investment and ensure a secure, long-lasting outdoor space.
Wrapping Up
So, what is best for your property? Speak with a structural engineer. Factors that will be considered are: the soils on the property, your building’s siding, deck design including proposed height and space requirements underneath the deck
Well, that’s it for Ledger Boards 101. If there is something you still have a question on please give us a call at 763-544-3355. We’d love to chat with you about your questions or projects.


